Multi-Line Pivot Teach Workflow
This workflow explains how to move or rotate a group of toolpath points using the Pivot Teach workflow.
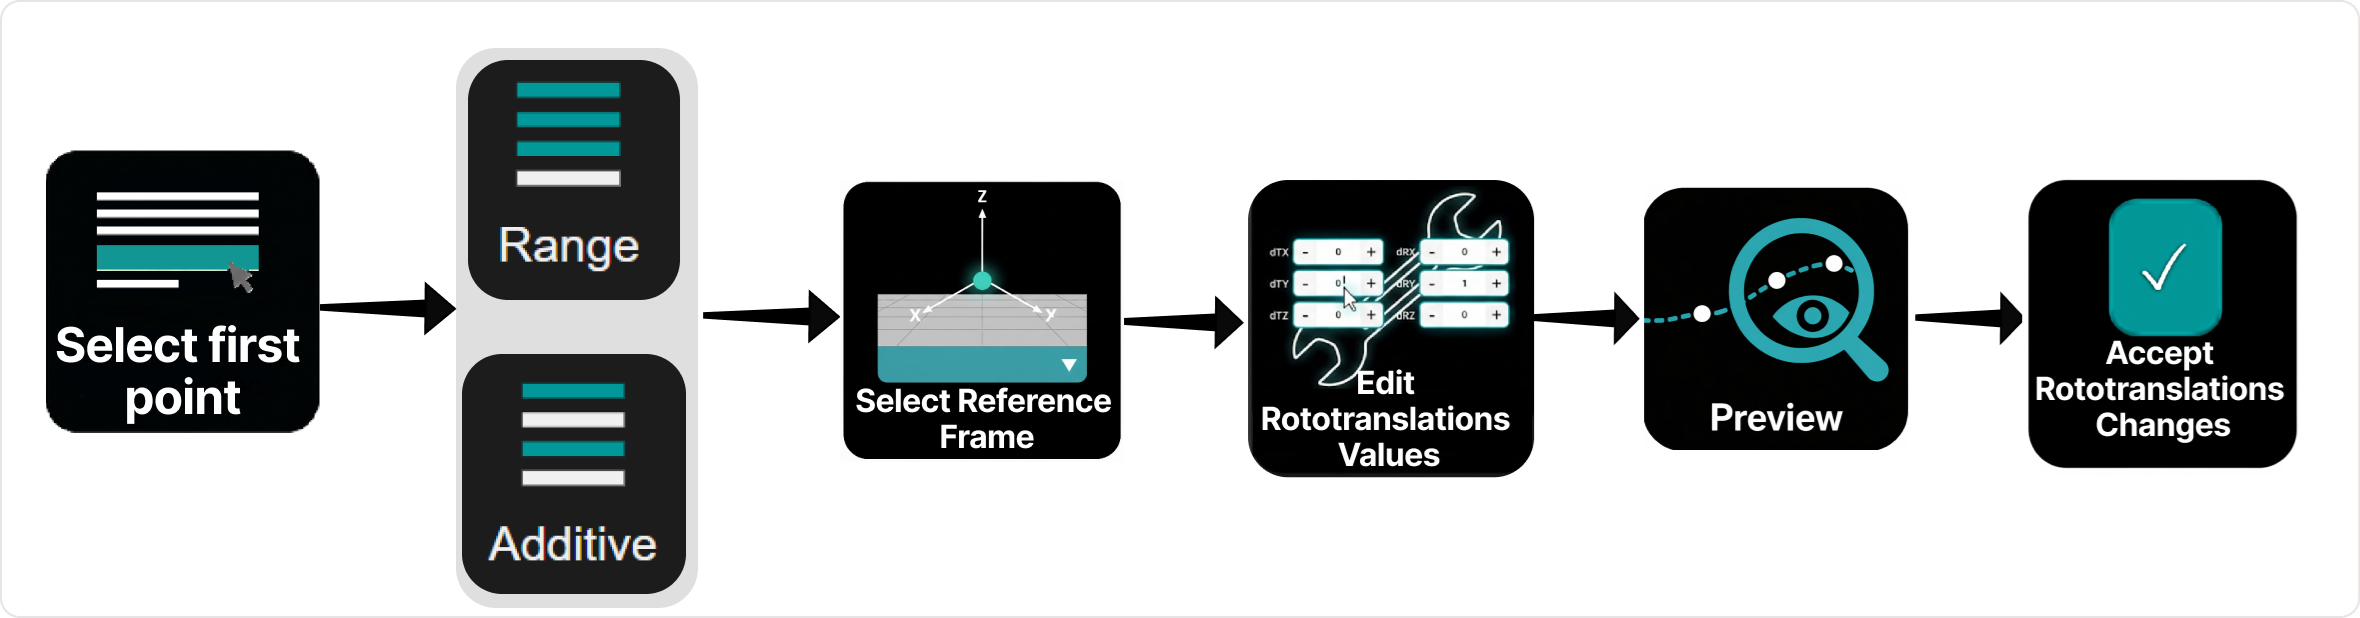
Workflow Steps
Step 1: Select the point
You can select a line from the NC Editor (for example, a linear point or regshape) or a point from the 3D Viewer by clicking the point directly.
Step 2: Select multiple lines
Extend the selection using Multi-Line Selection:
- CTRL — additive selection
- SHIFT — range selection
Step 3: Select the reference frame
In the Pivot Manipulator, choose the reference:
- Base Frame (G93) - the fixed machine frame is used as the reference.
- Pivot - the first selected motion point defines the reference frame position for the Manipulator. You can edit the manipulator position before applying the transformation.
Step 4: Edit Pivot Teach values
In the Pivot Teach Panel, enter:
- Translation offsets (dX, dY, dZ)
- Rotation angles (dRx, dRy, dRz)
Step 5: Preview the changes
Review the updated toolpath in the 3D Viewer using Pivot Teach Preview before applying the change.
Step 6: Accept Pivot Teach changes
Press Accept in the Pivot Teach Panel.
All selected points update simultaneously.
Workflow Multi-Line Pivot Teach
Operator insights
- Multi-line Pivot Teach is commonly used to align toolpaths with the workpiece or fixture position.
- When using Pivot reference, the first selected motion point becomes the transformation pivot.
- The preview toolpath allows you to verify the transformation before modifying the NC program.
- If the preview result is incorrect, adjust the transformation parameters or select a different pivot.
- Changing the selection or clearing the rototranslation values automatically cancels the preview.
- Always inspect the updated toolpath in the 3D Viewer before confirming the transformation.
Was this page helpful?