Uploading a Project
Purpose
Uploading a project is the first step when users want to work with a prepared production setup in Shopfloor Assistant. This action makes the required project data available for later use and stores it locally so it can be opened again when needed.
A project may contain setup-related information such as geometry, resources, fixtures, and other data required to visualize the working environment in the 3D Viewer.
Once uploaded, the project is stored locally and can be reopened later using the Open Project command.
Procedure
Step 1 — Start the Upload Project Command
Click the Upload Project button located in the left-side panel of the user interface.

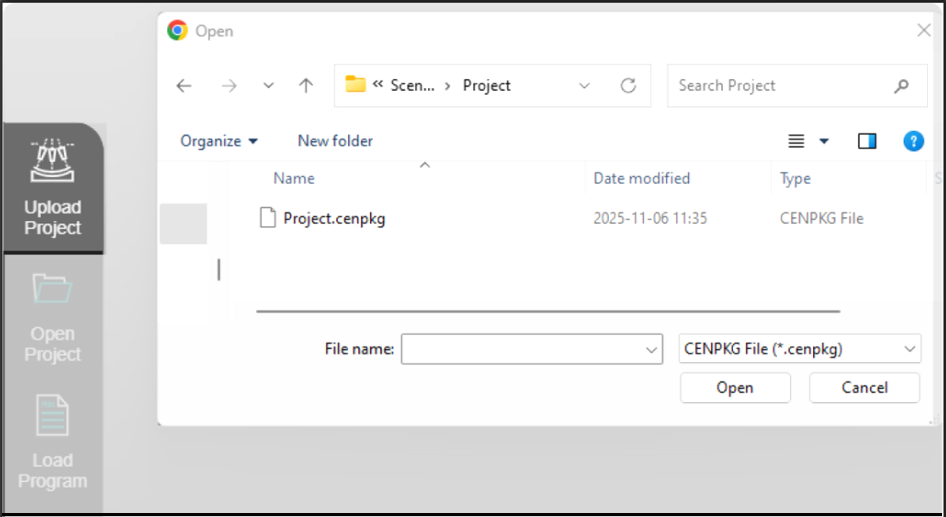
Step 2 — Select Your Project Scenario File
Supported formats include structured .cenpkg files prepared for Shopfloor Assistant.
Step 3 — Confirm the Upload
The system uploads the project to the data location defined in the Launcher settings or during installation.
Operator insights
- Keep project files clearly named and well organized for easy access.
- Use short file paths (for example
C:\ShopfloorAssistant) to avoid upload issues. - The upload process is optimized for speed and reliability. No internet connection is required because everything runs locally.