Line-by-Line Editing
Purpose
Line-by-Line Editing lets you review and modify individual program lines with precise control directly in the NC Editor Panel.
Depending on the selected line in the NC Editor Panel, you can edit supported motion values, axis or joint values when they are shown as part of the editable content, and supported event commands directly in the editor or in the related parameter-editing panel. The editing panel adapts to the selected part of the program, and modifications are synchronized with the 3D Area in real time so you can check the result visually while you work.
This workflow is useful when you want to correct one value, adjust one instruction, or make a focused local change without applying a larger transformation to a full selection. Users can modify individual lines or groups of lines, and supported NC panels provide inline editing for motions and events.
💡 Tip: Line-by-Line Editing changes the selected program content directly. The editing system is intended to prevent syntax errors that would cause the program to fail, and modifications are synchronized with the 3D Area so the visible result can be checked while editing.
What Line-by-Line Editing Helps You Do
Use Line-by-Line Editing when you want to make a focused change to one line or one instruction at a time.
This is helpful for small corrections that do not require a full multi-line workflow. The editing functions support direct changes to program content in the NC Editor, including inline editing and panel-based parameter editing.
Typical uses include:
- changing a supported motion value in one line
- changing a supported event command in one line
- adjusting axis or joint values when they are part of the editable line or parameter panel for the selected program element
Controller Note
The NC syntax displayed in the editor may vary depending on the controller.
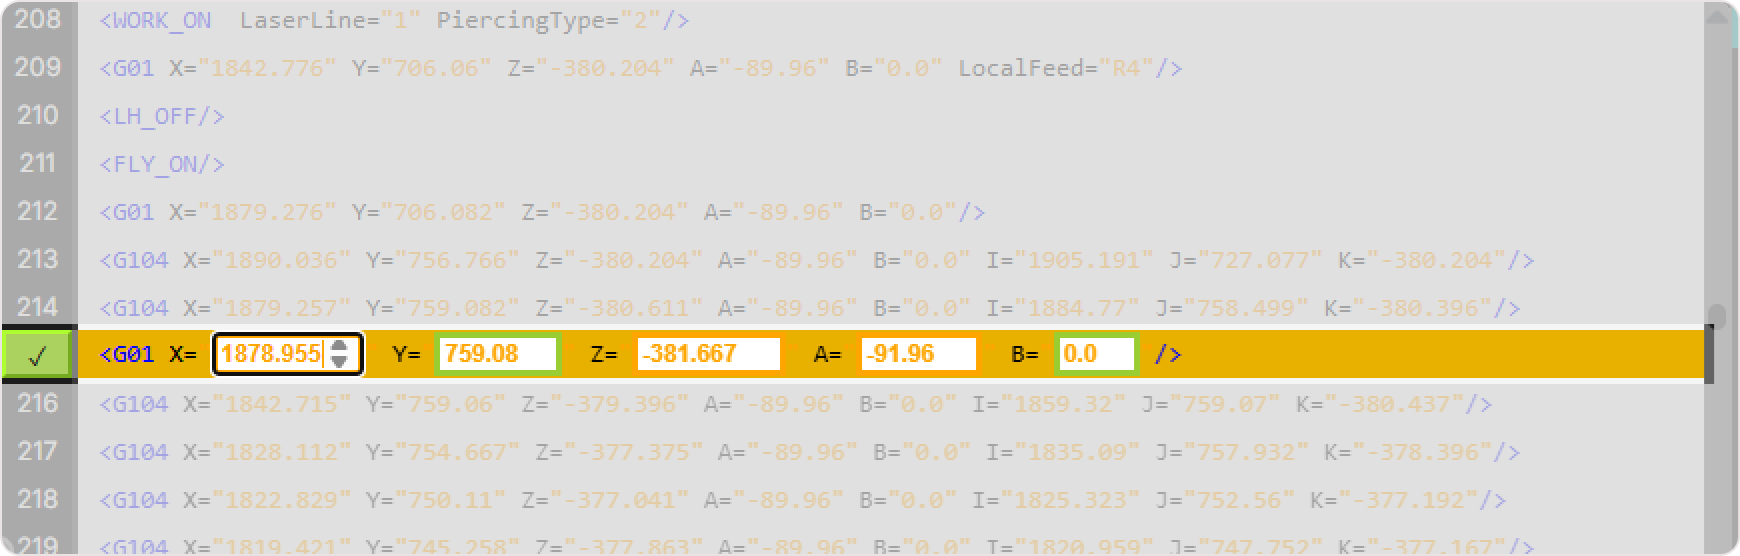
SinumerikOne example
<G01 X="1878.955" Y="759.08" Z="-381.667" A="-91.96" B="0.0" />P30L example
G01 X1876.955 Y759.08 Z-380.667 A-39.96 B0
How to Edit Line-by-Line
Step 1 — Select the Line
Select a motion line using either interface:
- click a line in the NC Editor
- select the corresponding point in the 3D Viewer
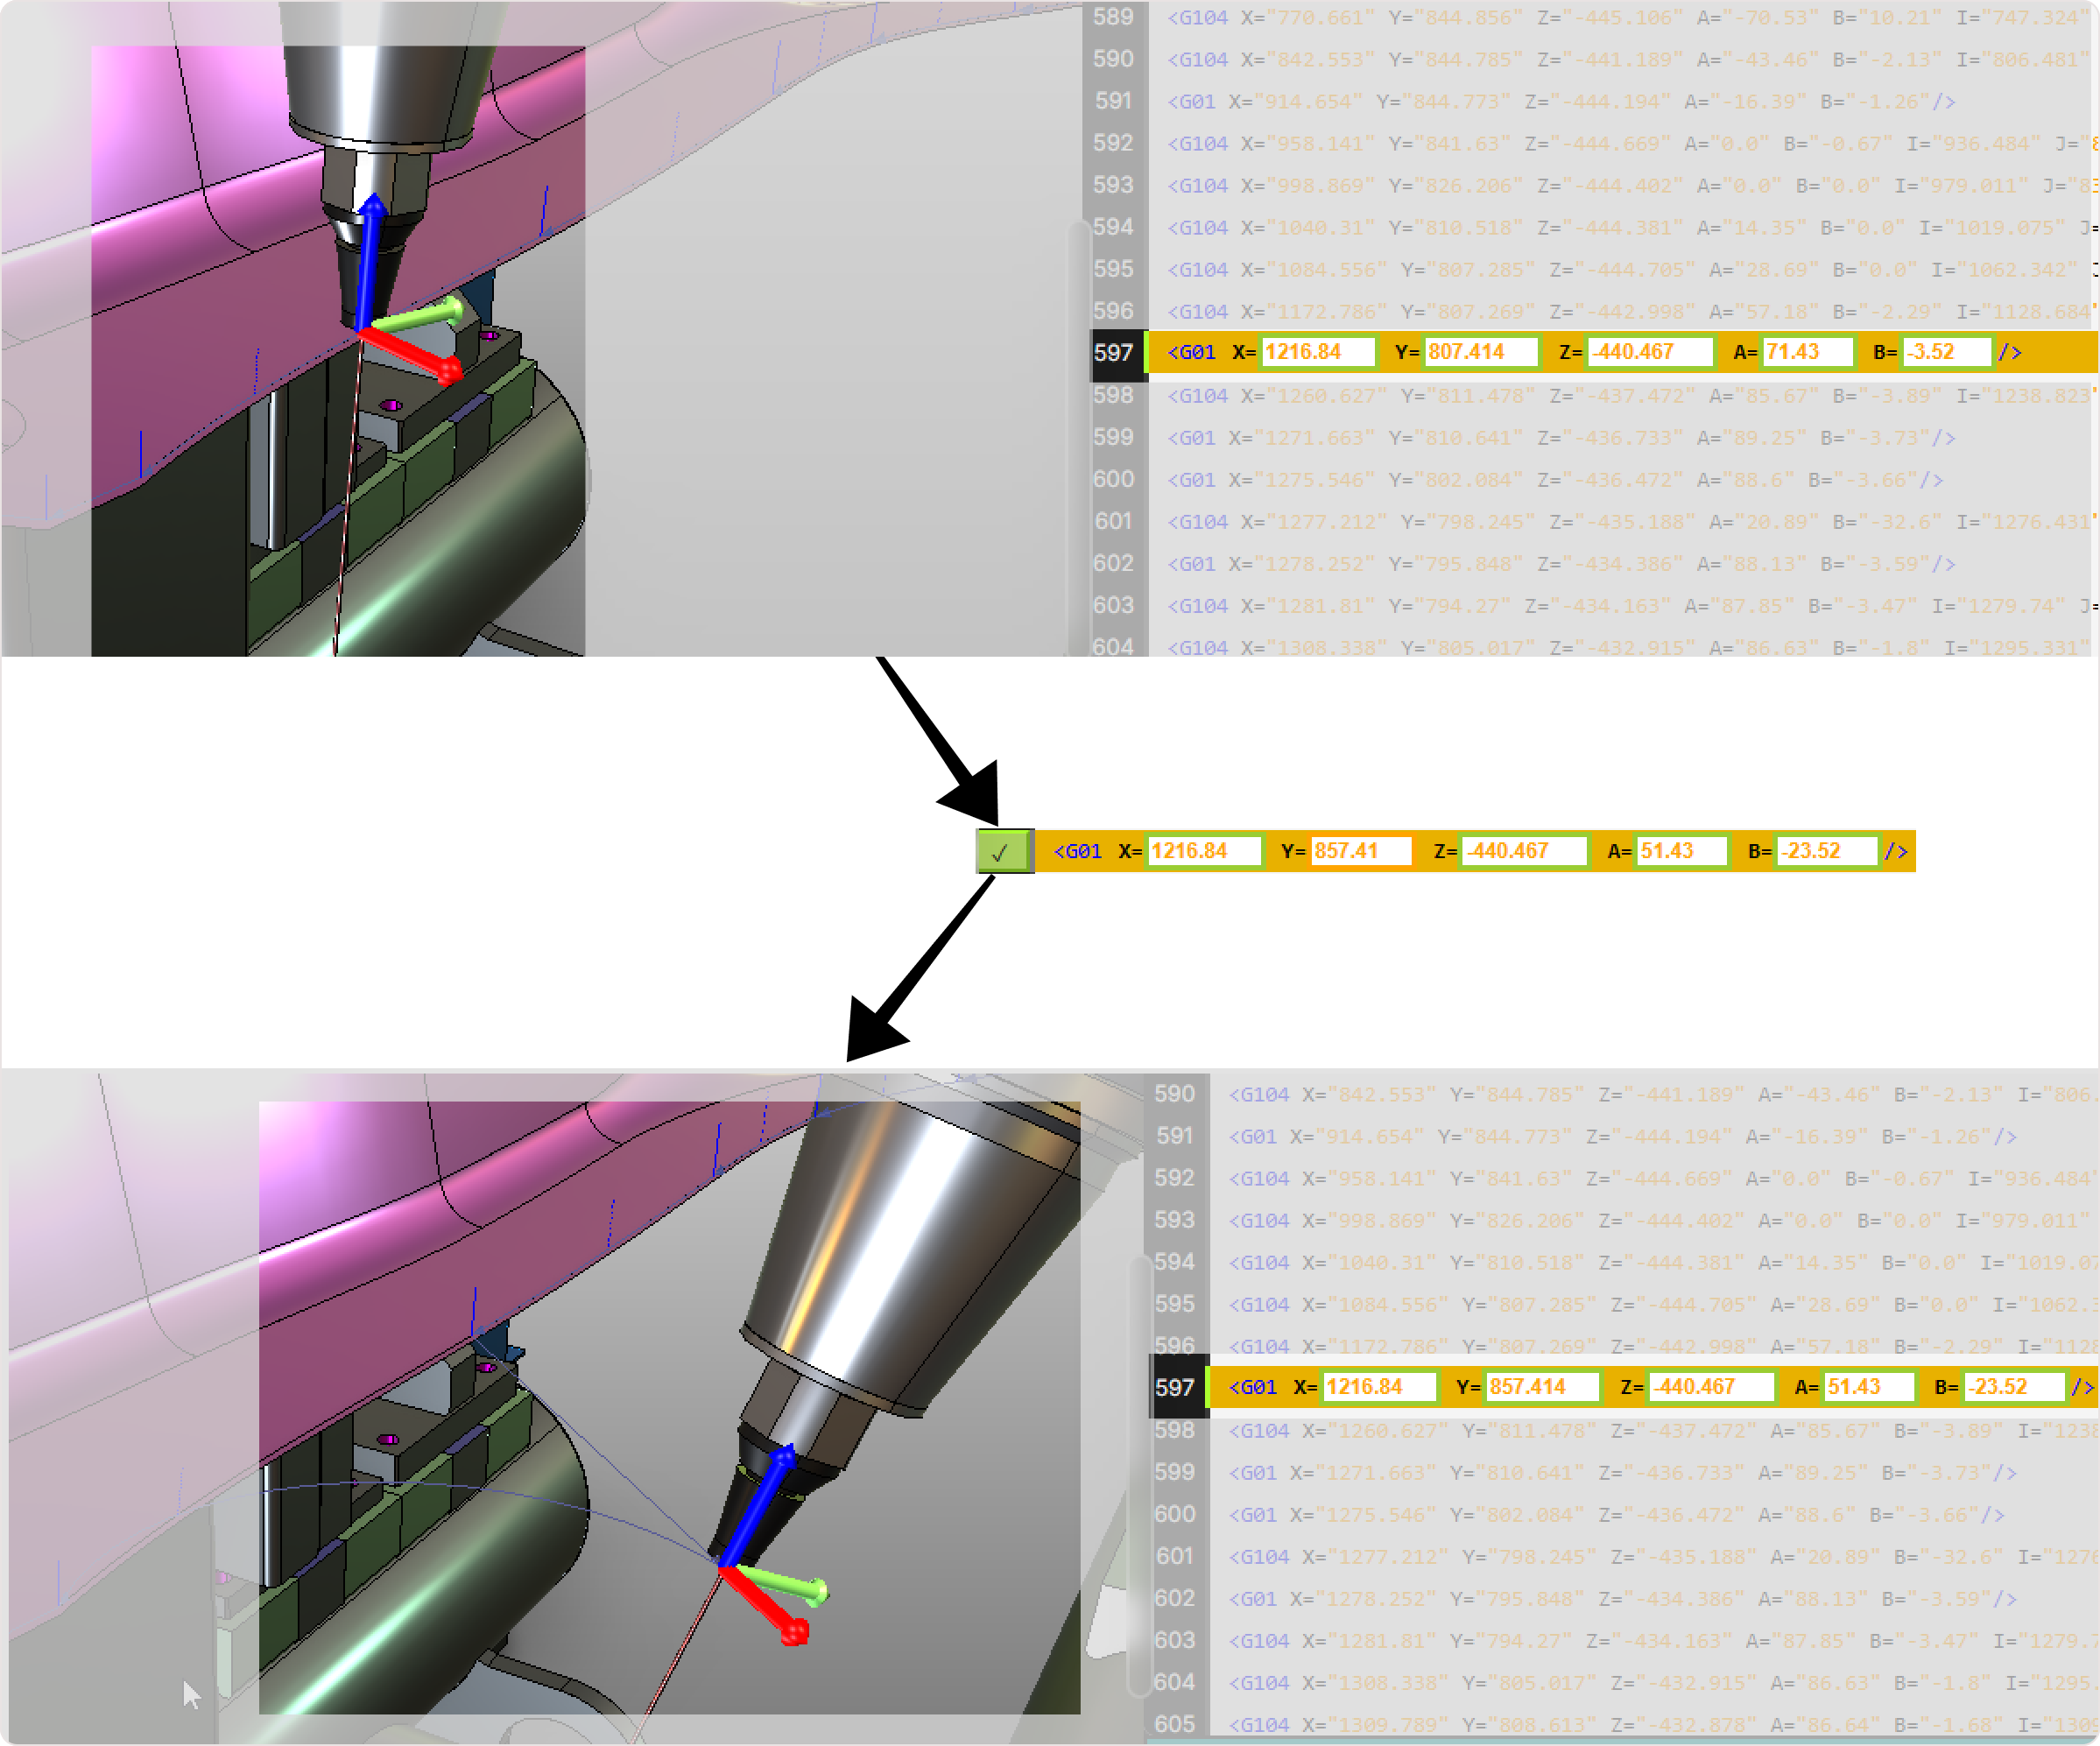
After selection, the machine moves to the selected point, giving immediate spatial context.
Step 2 — Edit Coordinates or Parameters
Modify the desired values directly in the NC Editor input fields.
Modify the required parameters directly in the editor.
Typical editable values include:
- Coordinates: X, Y, Z
- Tool orientation: A, B, C
- Base frame positions
- Feed values: Local Feed, Feed
- Other parameters: Laser Line, Piercing Type, and related parameters
Values can be adjusted numerically with high precision.
Step 3 — Confirm Changes
Edits become active only after pressing the Accept button located on the left side of the modified line.
After accepting the change:
- if the modification applies to a motion point, the 3D Viewer updates immediately, and the point moves to its new position or orientation
- if the modification applies to a non-positional line, the change is stored internally, but no visible update appears in the 3D Viewer
Step 4 — Validate Visually
After applying the change, verify the updated toolpath in the 3D Viewer.
Check the following aspects:
- tool position
- tool orientation
- clearance from surrounding geometry
- overall trajectory accuracy
Operator insights
- Edits are applied only after pressing Accept. This ensures full control, prevents accidental changes, and keeps the workflow deliberate and safe.
- Always monitor the 3D Viewer after accepting a change. Any modification to a motion point updates visually, helping you confirm accuracy immediately.
- Non-positional edits such as parameters, technologies, or feeds do not change the toolpath visually, but they are stored and included when saving or validating the program.
- Use line-by-line editing for high-precision corrections, especially when adjusting delicate trajectories, fine orientations, or single-point refinements.
- Combine selection from the NC Editor and 3D Viewer for faster navigation. Visual selection helps avoid mistakes when points are close together or densely packed.
- Workflow for Line-by-Line Editing - Single-Point Correction Workflow.